
Building GenAI Apps #2: Create an AI Math Tutor Chatbot with FastAPI, Jinja2 & KaTeX (Native HTML + CSS)

AI developers, here’s a secret: you don’t need to abandon your Python dev-stack to build production-ready MVP applications. With the right libraries, you can craft sophisticated, full-stack AI solutions that rival anything built with traditional web stacks—all while staying true to your AI roots.
In this tutorial, we’re going to build an AI Math Tutor Chatbot, a tool that solves math problems and explains them step-by-step, powered by Python and a few cleverly integrated web tools. This isn’t just another Streamlit demo—it’s a leap into real web development with HTML, CSS, and more, all tailored for AI enthusiasts like you.
Let me share a quick story…
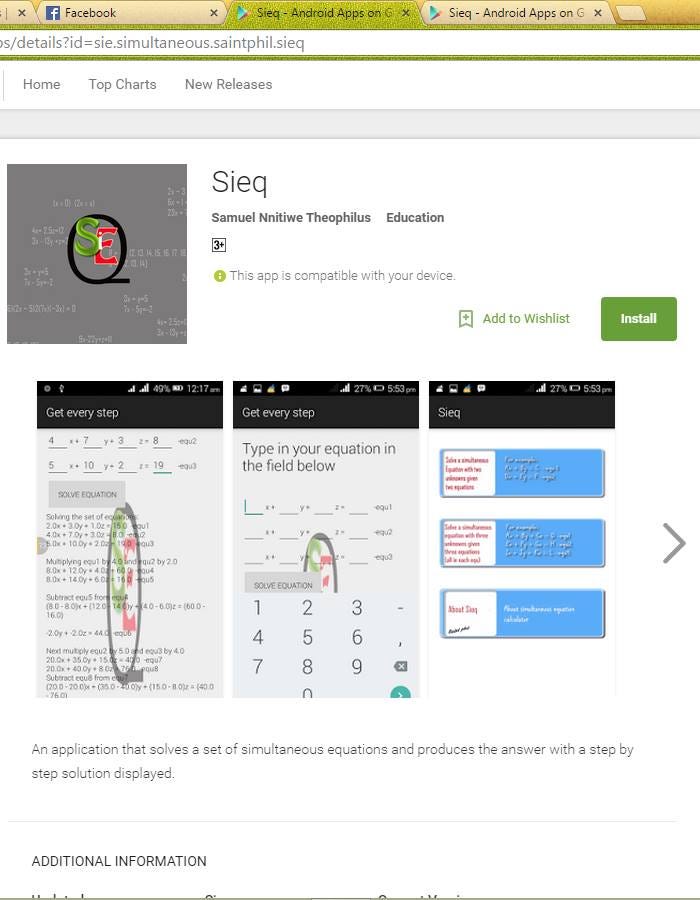
Back in my 300-level at the university (in August 2015), long before ChatGPT, Gemini, or even TensorFlow existed, I built a basic Simultaneous Equation Tutor Android App using Java. This mobile app tackled equations with two or three unknowns—like (x), (y), and (z)—and didn’t just spit out answers. It walked users through every step of the solution, from substitution to simplification. That project ignited my passion for creating tools mimicking intelligence, and it is the direct inspiration behind this tutorial.
Today, we’ll use modern AI (LLM) to take that idea further, building a chatbot that can tutor any math problem you throw at it (you can follow along and grab the full code from the GitHub repository HERE).
By the end, you’ll have a working app—and a solid foundation for building more ambitious AI projects.
What You’ll Learn
How to build a full-stack AI app with FastAPI (backend) and Jinja2 (frontend).
Integrating OpenAI to power intelligent, step-by-step math solutions.
Rendering beautiful math equations on the web with KaTeX.
Basics of web development using native HTML and CSS, enhanced with Bootstrap.
Structuring and deploying a production-ready app—no Streamlit shortcuts here!
Ready? Let’s get started.
Project Setup
Before we write a single line of code, let’s set up our workspace. Here’s the folder structure for our project:
teach-me-maths/
├── main.py           # FastAPI backend
├── templates/
│   └── index.html    # Frontend template
├── static/
│   └── (optional: favicon, custom CSS, images)
├── utils/
│   └── openai_helper.py  # LLM logic
└── .env              # Contains OPENAI_API_KEY
Prerequisites
You don’t need to be a web dev guru to follow along in this tutorial, but here’s what you’ll need:
Python 3.11+: Installed and ready to go.
Basic Python Skills: Comfort with variables, functions, and the command line.
OpenAI API Key: Sign up at OpenAI to get one.
A Curious Mind: No prior web dev experience? No problem—we’ll cover the essentials.
New to Web Development?
If terms like “frontend” or “backend” sound foreign, don’t sweat it. Here are some beginner-friendly resources to catch up:
Once you’ve got Python installed and your API key handy, create the folder structure above, and we’ll dive into the tools.
The Stack Explained
Our app is built on a mix of Python libraries and web tools. Let’s break it down into bite-sized pieces.
Python Libraries
FastAPI: A lightning-fast web framework for building APIs. It’s beginner-friendly yet powerful enough for production apps.
Jinja2: A templating engine that lets us mix Python logic with HTML, creating dynamic web pages.
openai: The official library for OpenAI’s API, which will power our math-solving brain.
python-dotenv: Keeps your API key safe in a .env file, away from prying eyes.
uvicorn: A server to run our FastAPI app (think of it as the engine that keeps things humming).
Web Tools
HTML & CSS: The building blocks of our frontend. HTML structures the page; CSS makes it pretty.
Bootstrap: A CSS framework that gives us responsive, polished designs without much effort.
KaTeX: A JavaScript library that renders LaTeX math expressions beautifully on the web. Such as:
\(x^2 + 2x + 1 \)
Why This Stack?
FastAPI + Jinja2: These let us build a full-stack app—backend and frontend—without needing a separate framework like React. FastAPI handles requests; Jinja2 serves up HTML.
OpenAI: Our AI tutor’s brain, turning math questions into detailed solutions.
KaTeX: Essential for displaying equations cleanly, using LaTeX syntax (the gold standard for math typesetting).
Bootstrap: Saves us from CSS headaches, ensuring our app looks good on any device.
How They Work Together
FastAPI runs the show, processing user requests and calling OpenAI for answers. Jinja2 takes those answers and weaves them into HTML templates. KaTeX then steps in to render any math, while Bootstrap keeps the design sleek. It’s a seamless flow from AI to user interface.
Installation
Create a requirements.txt file with these libraries:
fastapi
jinja2
uvicorn
openai
python-dotenv
Run this in your terminal:
pip install -r requirements.txtYou’re now ready to build!

A Basic Example: Hello World with FastAPI, Jinja2, and KaTeX
Let’s start small with a “Hello World” page to see how our tools play together. This will give you a feel for FastAPI, Jinja2, and KaTeX before we tackle the full app.
Step 1: Set Up FastAPI
Create main.py:
from fastapi import FastAPI, Request
from fastapi.responses import HTMLResponse
from fastapi.templating import Jinja2Templates

app = FastAPI()
templates = Jinja2Templates(directory="templates")

@app.get("/", response_class=HTMLResponse)
async def home(request: Request):
    return templates.TemplateResponse("index.html", {"request": request})
This sets up a FastAPI app that serves an HTML page at http://localhost:8000.
Step 2: Create the HTML Template
In the templates folder, create index.html:
<!DOCTYPE html>
<html lang="en">
<head>
    <meta charset="UTF-8">
    <meta name="viewport" content="width=device-width, initial-scale=1.0">
    <title>Hello World</title>
    <link rel="stylesheet" href="https://cdn.jsdelivr.net/npm/katex@0.16.0/dist/katex.min.css">
</head>
<body>
    <h1>Hello, World!</h1>
    <p>Check out this equation: \( E = mc^2 \)</p>
    <script defer src="https://cdn.jsdelivr.net/npm/katex@0.16.7/dist/katex.min.js"></script>
    <script defer src="https://cdn.jsdelivr.net/npm/katex@0.16.7/dist/contrib/auto-render.min.js"
        onload="renderMathInElement(document.body, {
        delimiters: [
            {left: '\\(', right: '\\)', display: false},
            {left: '\\[', right: '\\]', display: true}
        ]
        });">
    </script>
</body>
</html>
Here, we’ve added KaTeX to render Einstein’s famous equation.
Step 3: Run It
Launch the app with:
uvicorn main:app --reload
Open your browser to http://localhost:8000. You’ll see “Hello, World!” and a nicely rendered:
This is our foundation—FastAPI serving a Jinja2 template with KaTeX magic.
Building the AI Math Tutor: Step-by-Step Guide
Now, let’s build the real deal: an AI-powered math tutor. We’ll split this into three parts: AI logic, backend, and frontend.
Step 1: OpenAI Helper (AI Logic)
First, we need OpenAI to solve math problems. Create openai_helper.py in the utils folder:
import os
from openai import OpenAI
from dotenv import load_dotenv

load_dotenv()
client = OpenAI(api_key=os.getenv("OPENAI_API_KEY"))

def get_math_response(prompt: str) -> str:
    system_prompt = (
        "You are a helpful math tutor. "
        "Solve math questions step-by-step, clearly, using LaTeX (KaTeX syntax) for math formatting "
        "and HTML tags (e.g., <b>, <p>, <br>) for text formatting. "
        "Explain prerequisites if needed before solving."
    )
    response = client.chat.completions.create(
        model="gpt-4o-mini",
        messages=[
            {"role": "system", "content": system_prompt},
            {"role": "user", "content": prompt}
        ]
    )
    return response.choices[0].message.content.strip()
What’s Happening?: This function takes a math question, sends it to OpenAI with instructions to format answers for KaTeX and HTML, and returns the response.
Security Note: The
.envfile (e.g.,OPENAI_API_KEY=your_key_here) keeps your API key safe.
Step 2: Backend (FastAPI + Jinja2)
Update main.py to handle user input and display responses:
from fastapi import FastAPI, Request, Form
from fastapi.responses import HTMLResponse
from fastapi.templating import Jinja2Templates
from utils.openai_helper import get_math_response
from dotenv import load_dotenv
from datetime import datetime

load_dotenv()

app = FastAPI()
templates = Jinja2Templates(directory="templates")

@app.get("/", response_class=HTMLResponse)
async def home(request: Request):
    return templates.TemplateResponse("index.html", {"request": request})

@app.post("/", response_class=HTMLResponse)
async def ask_math(request: Request, question: str = Form(...)):
    result = get_math_response(question)
    if result:
        user_query = {"type": "user", "message": question, "timestamp": datetime.utcnow()}
        agent_query = {"type": "agent", "message": result, "timestamp": datetime.utcnow()}
        response = [user_query, agent_query]
    else:
        response = []
    return templates.TemplateResponse("index.html", {"request": request, "response": response})
GET Route: Serves the homepage.
POST Route: Takes a user’s question, gets the AI’s answer, and sends both to the template.
Step 3: Frontend (HTML, Bootstrap, KaTeX)
Update index.html in templates:
<!-- Teach Me Maths - HTML Template (Bootstrap + Jinja2 Friendly) -->
<!DOCTYPE html>
<html lang="en">
<head>
  <meta charset="UTF-8">
  <meta name="viewport" content="width=device-width, initial-scale=1.0">
  <title>Teach Me Maths</title>
  <link href="https://cdn.jsdelivr.net/npm/bootstrap@5.3.0/dist/css/bootstrap.min.css" rel="stylesheet">
  <link rel="stylesheet" href="https://cdn.jsdelivr.net/npm/katex@0.16.7/dist/katex.min.css">
  <style>
    body { background-color: #f8f9fa; }
    .chat-box { min-height: 10px; overflow-y: visible; margin-bottom: 1rem; }
    .bubble-user { background-color: #d1e7dd; padding: 10px 15px; border-radius: 10px; margin: 5px 0; }
    .bubble-ai { background-color: #e2e3e5; padding: 10px 15px; border-radius: 10px; margin: 5px 0; }
    .math-rendered { font-size: 1.2rem; color: #212529; }
  </style>
</head>
<body>

<div class="container py-5">
  <div class="text-center mb-4" style="font-size: 2rem;">
                    🧠
                    <span class="katex-math">\( \boxed{\textsf{Teach~Me}} \)</span>
                    <span class="katex-math" style="color: purple;">\( \mathbb{M}\! \mathbb{A}\! \mathbb{T}\! \mathbb{H}\! \mathbb{S} \)</span>
                    </div>


        <div class="card">
            <div class="card-body">
                {% if response is not defined %}
                <div style="margin: 150px;">
                   <img src="/static/power.png" alt="Teach Me Maths Logo" class="img-fluid">

                </div>

                <div class="row row-cols-1 row-cols-md-3 g-4">
                <div class="col">
                <div class="card text-white bg-primary h-100">
                    <div class="card-body">
                    <p class="card-text">“Solve \( \int x^2 dx \) step-by-step”</p>
                    </div>
                </div>
                </div>
                <div class="col">
                <div class="card text-white bg-success h-100">
                    <div class="card-body">
                    <p class="card-text">“What is the derivative of \( \sin(x^2) \)?”</p>
                    </div>
                </div>
                </div>
                <div class="col">
                <div class="card text-white bg-warning h-100">
                    <div class="card-body">
                    <p class="card-text">“Explain the concept of eigenvectors”</p>
                    </div>
                </div>
                </div>
                <div class="col">
                <div class="card text-white bg-info h-100">
                    <div class="card-body">
                    <p class="card-text">“How can I master calculus in 30 days?”</p>
                    </div>
                </div>
                </div>
                <div class="col">
                <div class="card text-white bg-danger h-100">
                    <div class="card-body">
                    <p class="card-text">“What math should I know before learning machine learning?”</p>
                    </div>
                </div>
                </div>
                <div class="col">
                <div class="card text-white bg-dark h-100">
                    <div class="card-body">
                    <p class="card-text">“What is the Fourier transform used for in real life?”</p>
                    </div>
                </div>
                </div>
            </div>
            {% endif %}
        <div class="chat-box" id="chatBox">
            {% for message in response %}
            <div class="{{ 'bubble-user text-end' if message.role == 'user' else 'bubble-ai' }}">
                {% if message.type == 'user' %}
                <strong>You:</strong> {{ message.message }}
                {% else %}
                <strong>AI:</strong> <br> <span class="math-rendered">{{ message.message | safe }}</span>
                {% endif %}
            </div>
            {% endfor %}
        </div>

        <form method="post" action="/" >
            <div class="input-group">
                <input type="text" name="question" class="form-control" placeholder="Ask a maths question..." required>
                <button type="submit" class="btn btn-dark" style="border-bottom-right-radius: 70px; border-top-right-radius: 70px;">Ask</button>
            </div>
        </form>
    </div>
  </div>
</div>

<script defer src="https://cdn.jsdelivr.net/npm/katex@0.16.7/dist/katex.min.js"></script>
<script defer src="https://cdn.jsdelivr.net/npm/katex@0.16.7/dist/contrib/auto-render.min.js"
    onload="renderMathInElement(document.body, {
      delimiters: [
        {left: '\\(', right: '\\)', display: false},
        {left: '\\[', right: '\\]', display: true}
      ]
    });">
  </script>
</body>
</html>
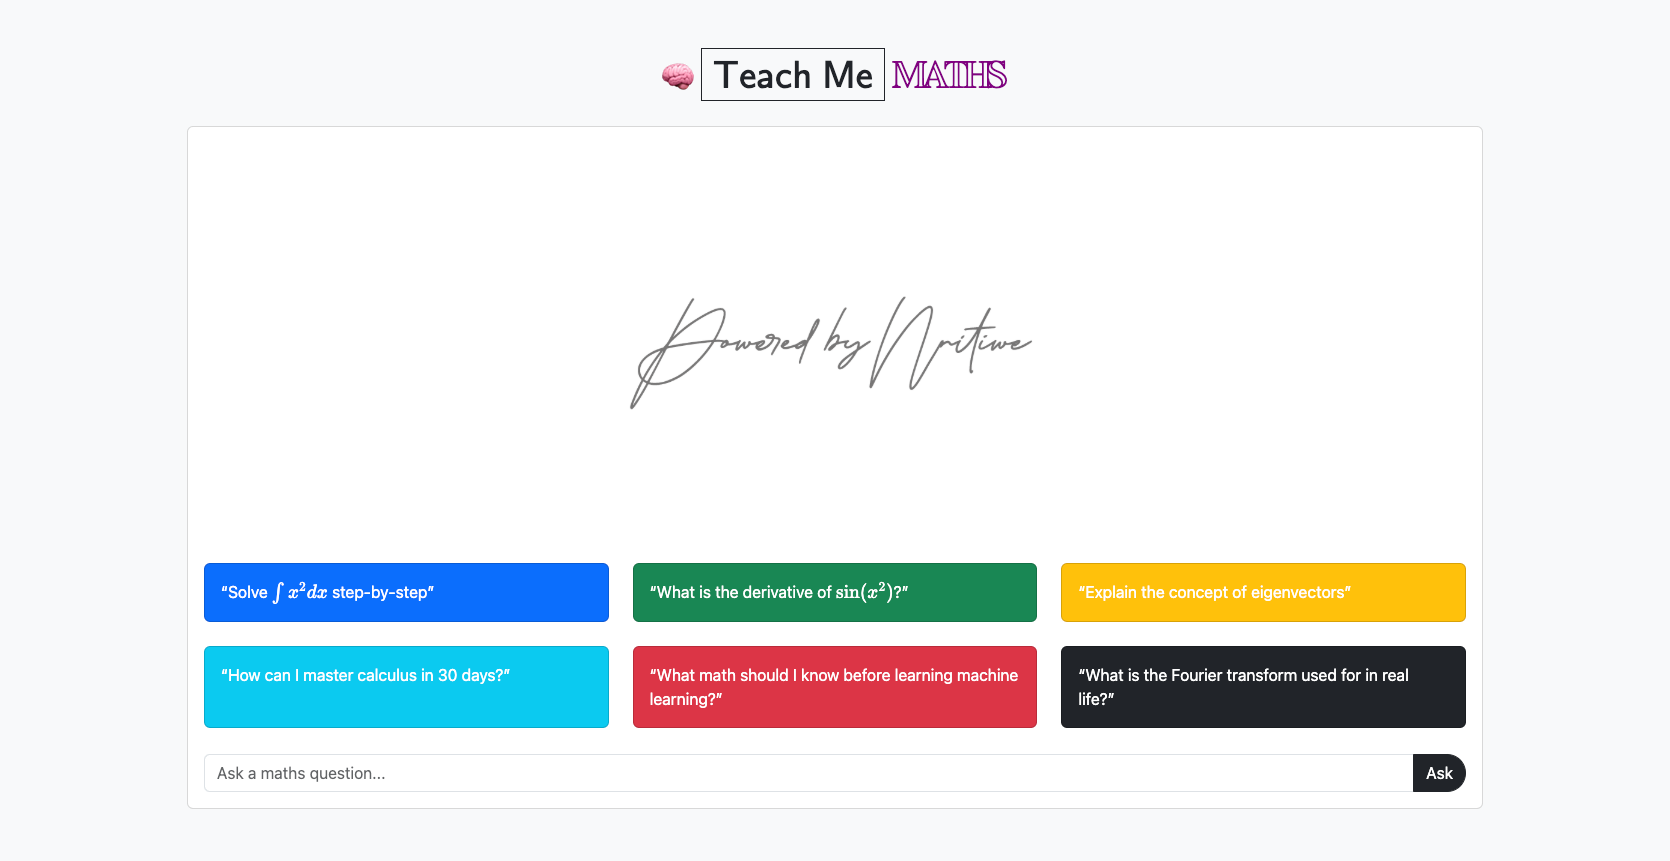
Design: Bootstrap gives us a clean, responsive layout. The form takes user input, and responses appear as styled alerts.
Jinja2 Magic: The
{% for message in response %}block displays the conversation, with| safeensuring HTML/LaTeX renders correctly in{{ message.message | safe }}.KaTeX: Automatically renders any math in the AI’s response.
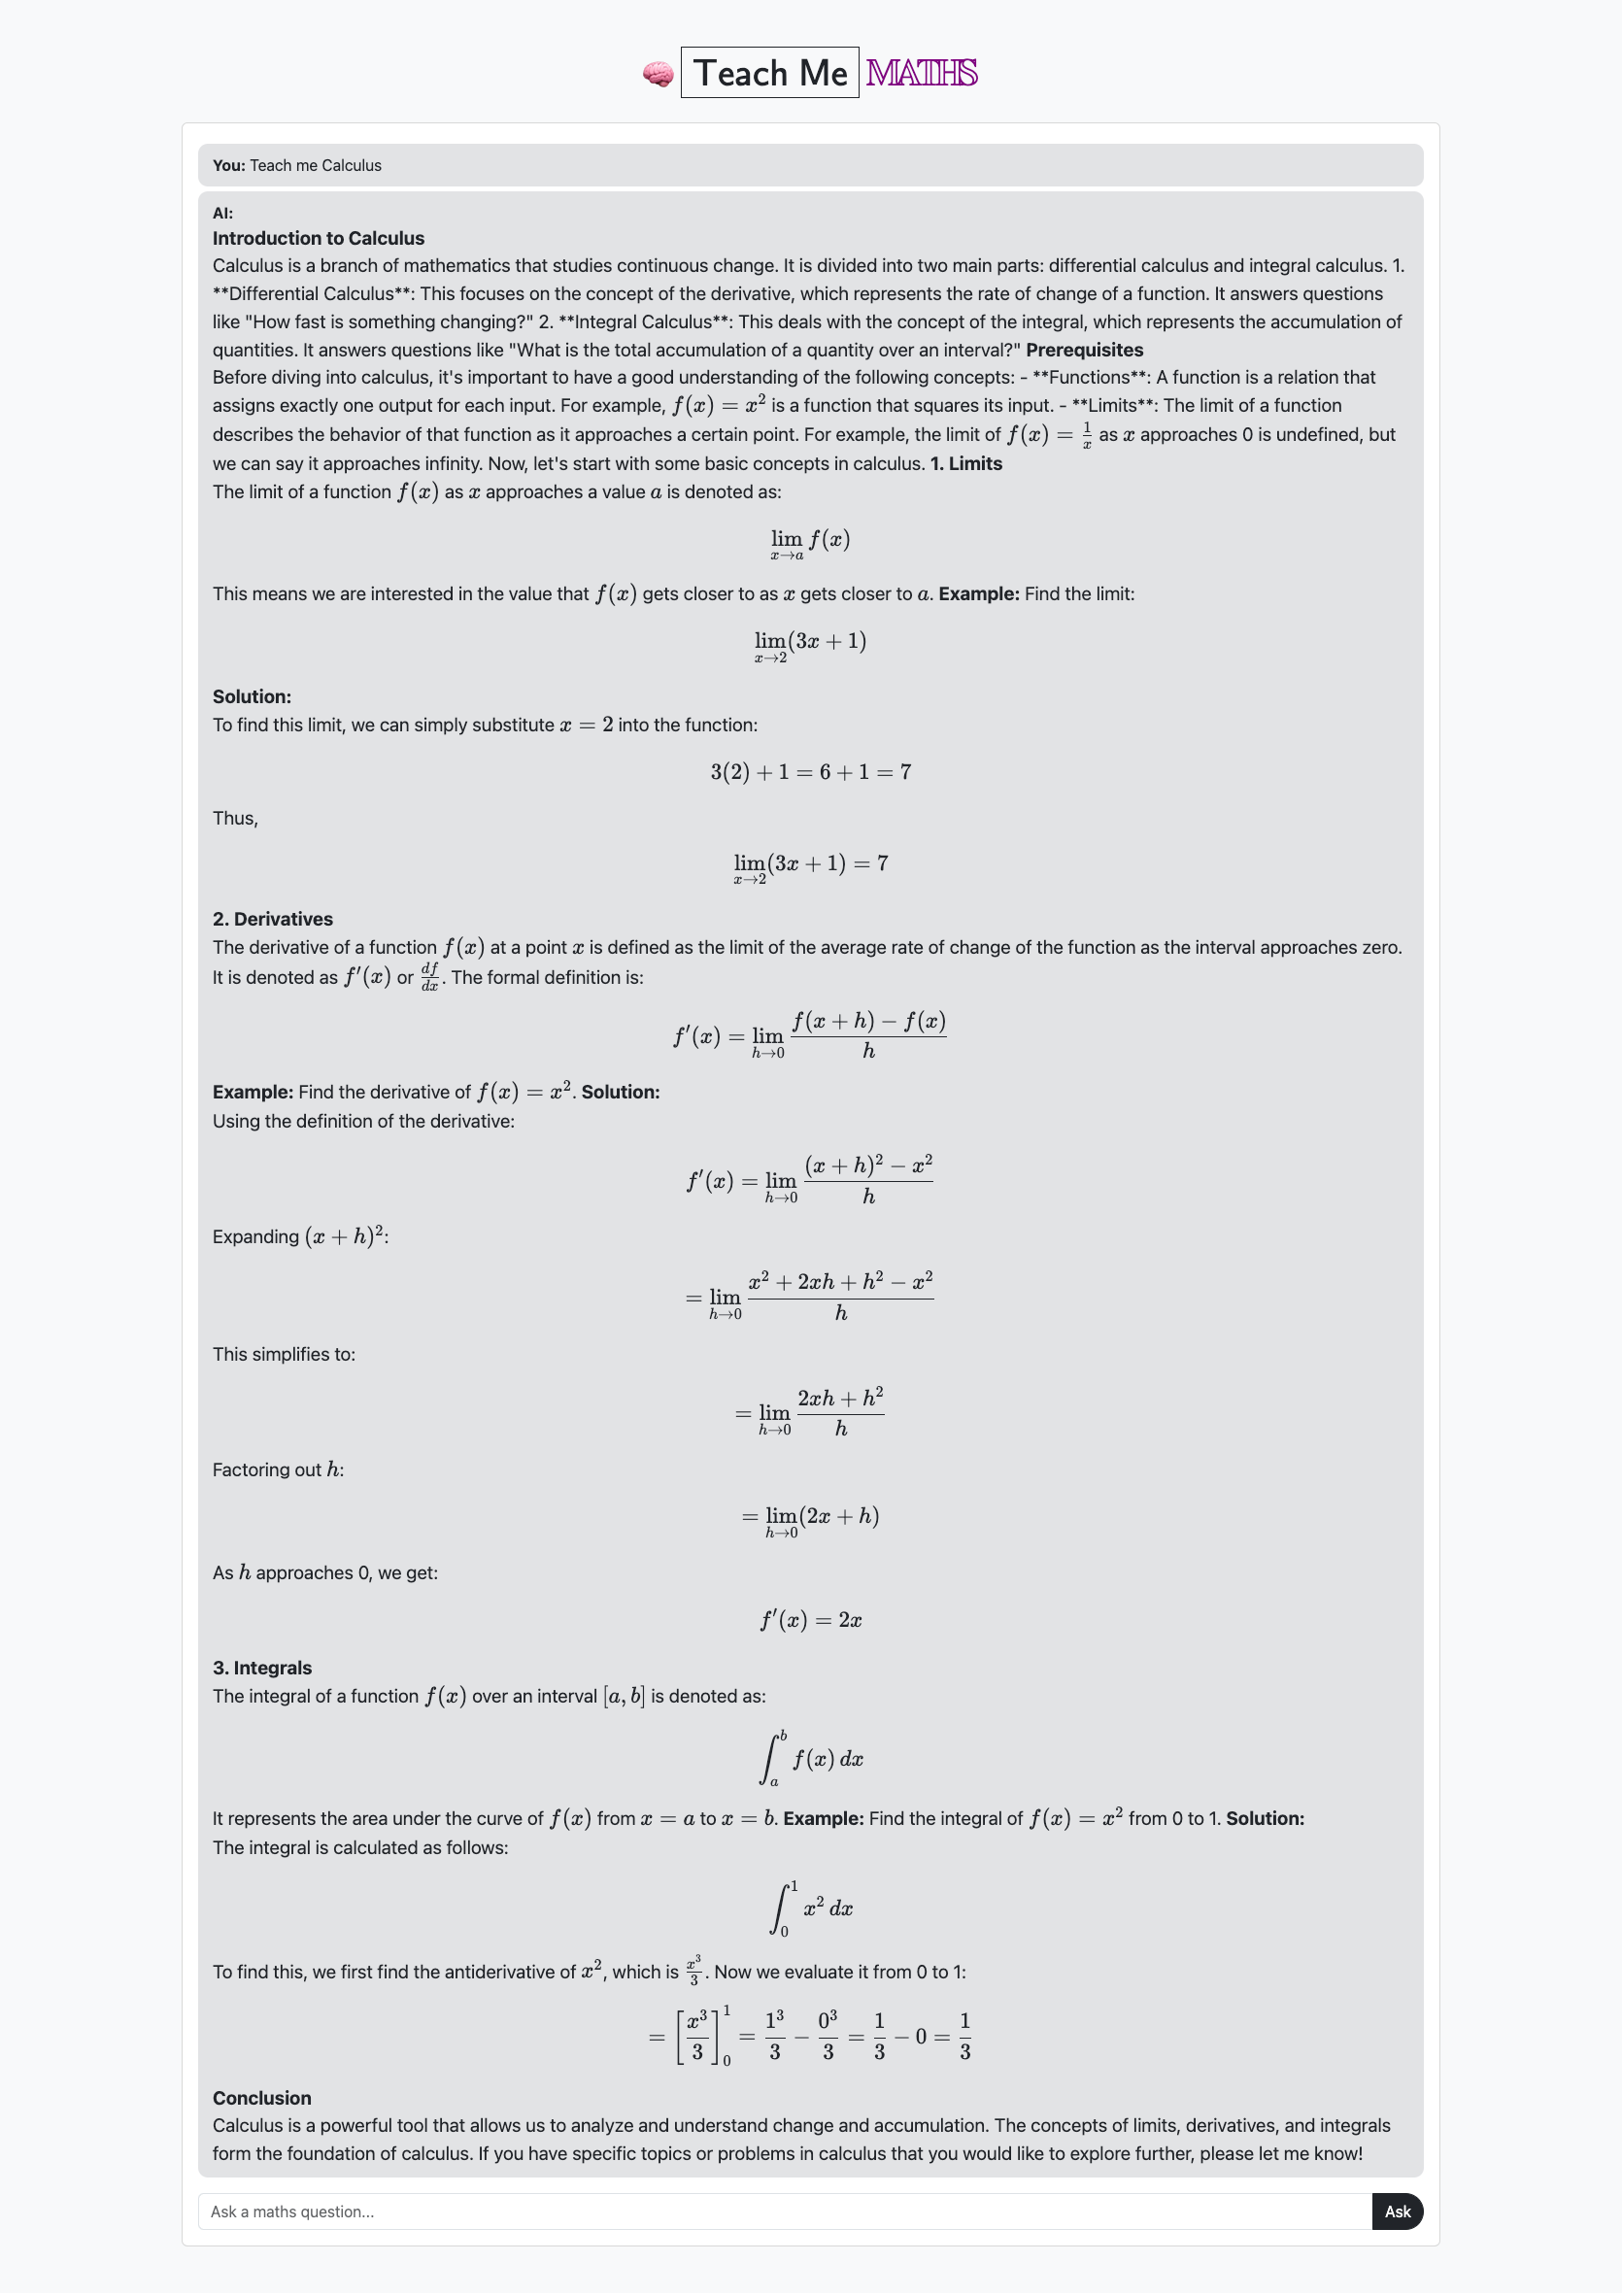
Test It Out
Run the app again (uvicorn main:app --reload), visit http://localhost:8000, and ask something like:
Watch the AI tutor shine!
Final Thoughts
You did it! You’ve built an AI Math Tutor Chatbot that’s both functional and production-ready. But this is just the beginning.
Want to share your app with the world? Deploy it on cloud infrastructure like Render or Vercel—it’s fast and free for small projects. Check out my detailed guide on deploying FastAPI apps on Vercel.
If you wish to further fine-tune the AI logic, you can read my article titled “Extracting Data with OpenAI: An Introduction to Function Calling and JSON Formatting” for more insights.
Extensibility Ideas
Take it further:
MongoDB: Store chat histories for users to revisit later.
Authentication: Add logins for a personalized tutor experience.
More Features: Support graphs or even image-based math problems.
What do you think?
If you’d like a more advanced version of this app—or have ideas to make it even cooler—drop a comment below. I’m all ears!