
Building GenAI Apps #4: Create Your First Real-Time AI Voice Agent with LiveKit, OpenAI, and ElevenLabs

It’s 2 AM, and a customer dials your support line with a pressing question about your product. Instead of a sleepy human or an endless hold music loop, they’re greeted by a warm, friendly voice that listens, understands, and responds instantly, solving their issue without missing a beat. This isn’t science fiction; it’s an AI voice agent, powered by the latest in Generative AI technology, ready to revolutionize how businesses connect with their customers, 24/7.
In this 4th installment of the “Building GenAI Apps” series, we’re diving into the world of real-time AI voice agents. This tutorial will walk you through building your very own voice agent using LiveKit, OpenAI, and ElevenLabs.

What Exactly Is a Real-Time AI Voice Agent?
A real-time AI voice agent is like a super-smart virtual assistant that talks to you. It listens to what you say, understands it, and replies with a natural, human-like voice—all in the blink of an eye. Think of it as a next-level Siri or Alexa, perfect for things like call center support, booking systems, or even personal assistants that never sleep.
To make this magic happen, we need a few key ingredients:
Voice Activity Detection (VAD): Picture this as the agent’s ears. It listens to the audio stream and figures out when someone’s talking versus when it’s just background noise—like a dog barking or a car honking.
End of Utterance Detection (EOU): This is how the agent knows you’ve finished speaking. It’s like waiting for you to pause after asking, “Can you help me with my order?” so it can jump in with an answer.
Speech-to-Text (STT): This turns your spoken words into written text. If you say, “I need help,” it transcribes the audio to “I need help” text for the AI to read.
Large Language Models (LLMs): This is the brain. It takes the text from STT, thinks about it, and writes a smart reply—like “Sure, I’d be happy to assist!”
Text-to-Speech (TTS): The voice! This converts the generated AI text response into spoken words, providing a friendly, “Sure, I’d be happy to assist!” as an audio playback.
Together, these pieces create a conversation that feels smooth and natural, even though it’s all powered by code and clever machines.
Turn-Based vs. Real-Time Agents: What’s the Difference?
Not all voice agents are alike. There are two main types: real-time and turn-based.
Turn-Based Agents: These work like a game of ping-pong with a slow serve. They wait for you to finish talking, process everything in one big chunk, and then reply. It’s fine for simple tasks, but the delay can feel clunky, like waiting a few seconds for a “Hello” after you say “Hi” (which is impractical for real-time communication).
Real-Time Agents: These types of voice agents process speech as you talk, cutting the delay to almost nothing. It’s like chatting with a friend who responds right away, making it perfect for fast-paced scenarios like customer support.
For this tutorial, we’re going with a real-time agent. Why? Because low latency—the tiny gap between your words and the AI’s reply—is everything. A laggy conversation feels awkward, but a snappy one feels human.
To pull this off, we’ll use LiveKit, which taps into WebRTC (Web Real-Time Communication). WebRTC is a technology that enables devices to communicate directly with each other—such as a video call in your browser—keeping things fast and smooth (the same technology used in apps like Zoom for video calls). LiveKit adds extra tricks to handle audio streams with almost no delay, making it our secret weapon.
The Tools Powering Our Real-Time Voice Agent
We’re developing this agent with a team of tools, each contributing something unique.
LiveKit: The backbone for real-time audio. It utilizes WebRTC to stream sound with extremely low latency, ensuring your agent responds lightning-fast.
OpenAI: The brain and ears. It handles Speech-to-Text (converting your voice into text) and powers the large language model (writing intelligent replies).
ElevenLabs: The voice box. Its Text-to-Speech tech creates speech so natural, you’d swear it’s a real person talking.
Silero VAD: The listener. This library detects when someone’s speaking, so the agent knows when to perk up and pay attention.
Why LiveKit Shines
LiveKit isn’t just any tool; it’s a powerhouse for real-time apps. Here’s why it’s perfect for our voice agent:
Lightning-Fast: Thanks to WebRTC, latency is kept low, allowing conversations to flow smoothly without interruptions.
Scalable: It can handle tons of users at once—great if your business grows or you want to experiment big.
Flexible: Whether it’s a simple call or a complex setup, LiveKit bends to fit your needs.
Secure: It locks down your audio with end-to-end encryption, keeping chats private.
Open-Source: You can modify it as you like, with no strings attached.
For more details, peek at the LiveKit docs. It’s our go-to for making this agent zippy and reliable.
Step-by-Step Guide: Build Your AI Voice Agent
Before we dive into the code, let’s ensure you have all the necessary accounts and API keys ready. We’ll use Python along with Jupyter Notebook and break it down into simple steps.
Step 1: Set Up Your Accounts and API Keys
Here’s how to get your API keys—think of them as secret passwords that let your code talk to these services.
LiveKit
To keep this guide simple, we will be using the
self-hostedcloud installation of LiveKit. Head to LiveKit Cloud and sign up.Log in and click “Create a new project.”
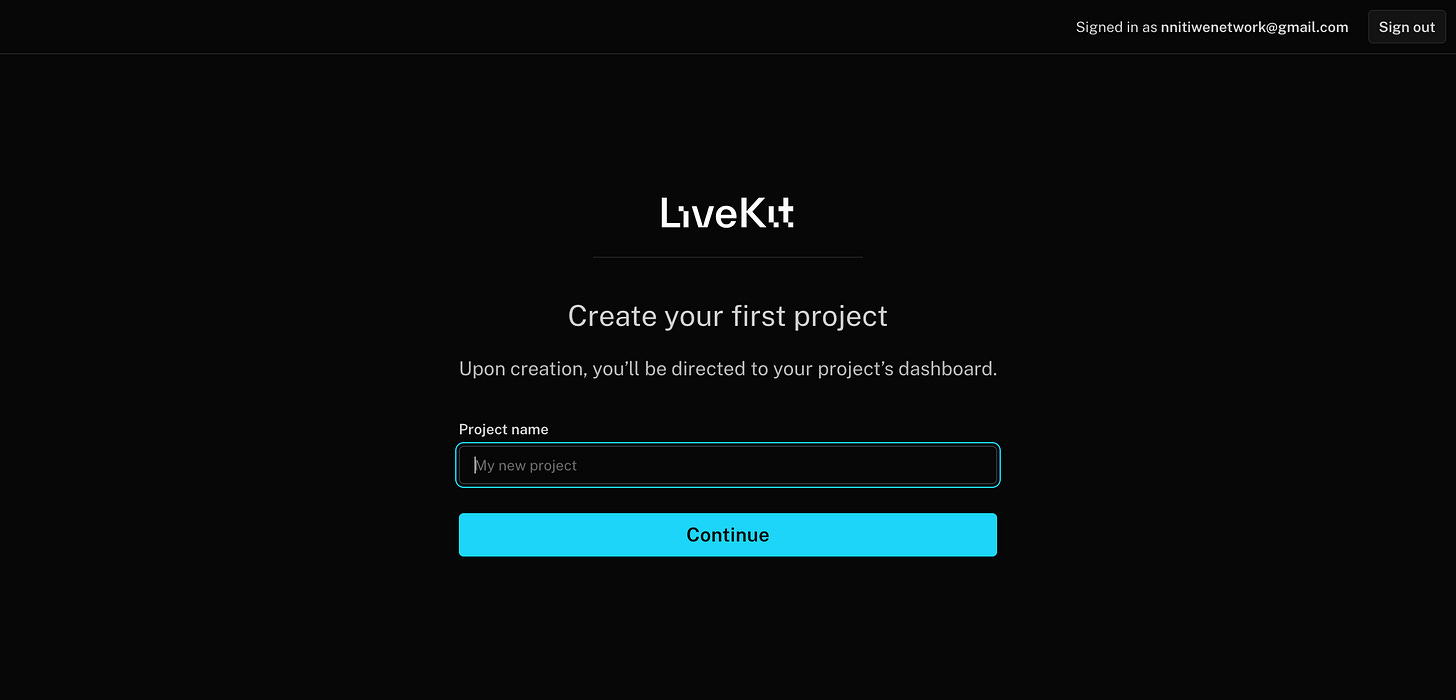
Once your project’s ready, you’ll see an API Key, API Secret, and URL.
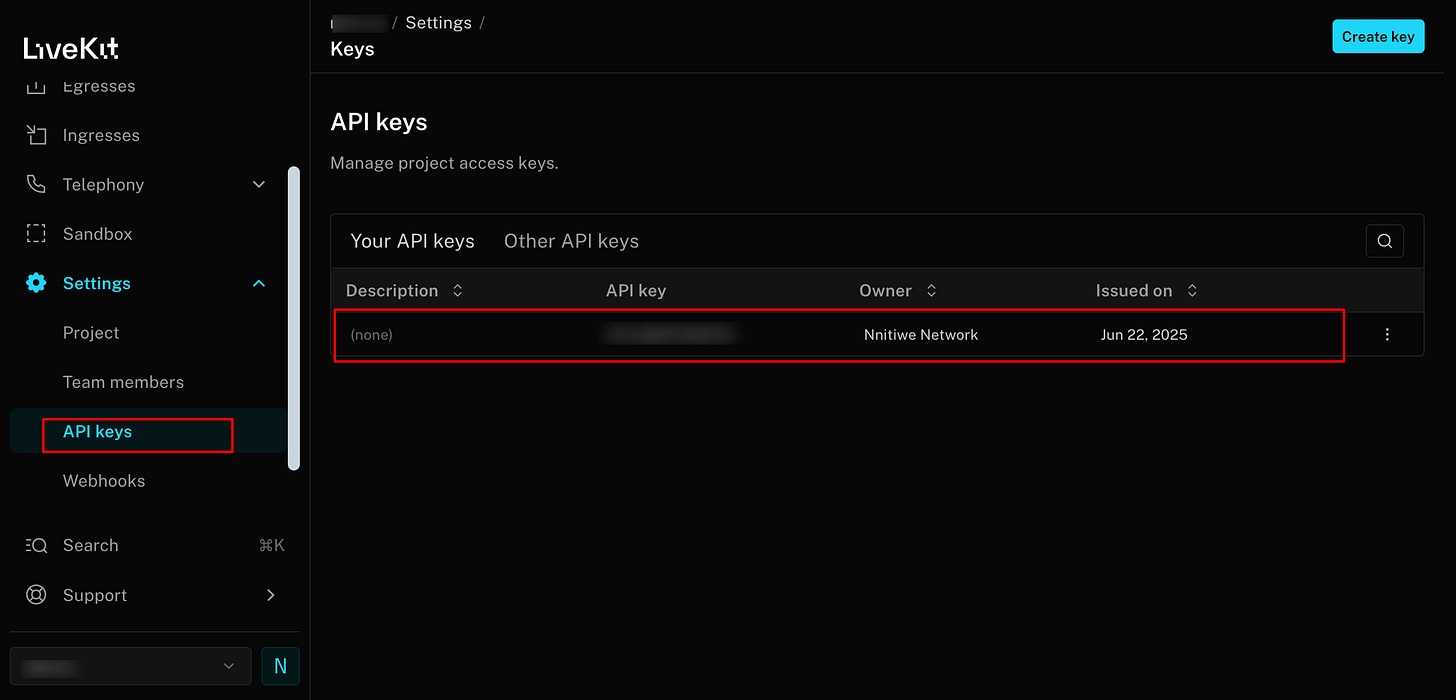
Copy these somewhere safe.


OpenAI
Visit OpenAI and sign up or log in.
Go to the “API” section in your dashboard.

Click “Create new API key,” copy it, and store it securely.

ElevenLabs
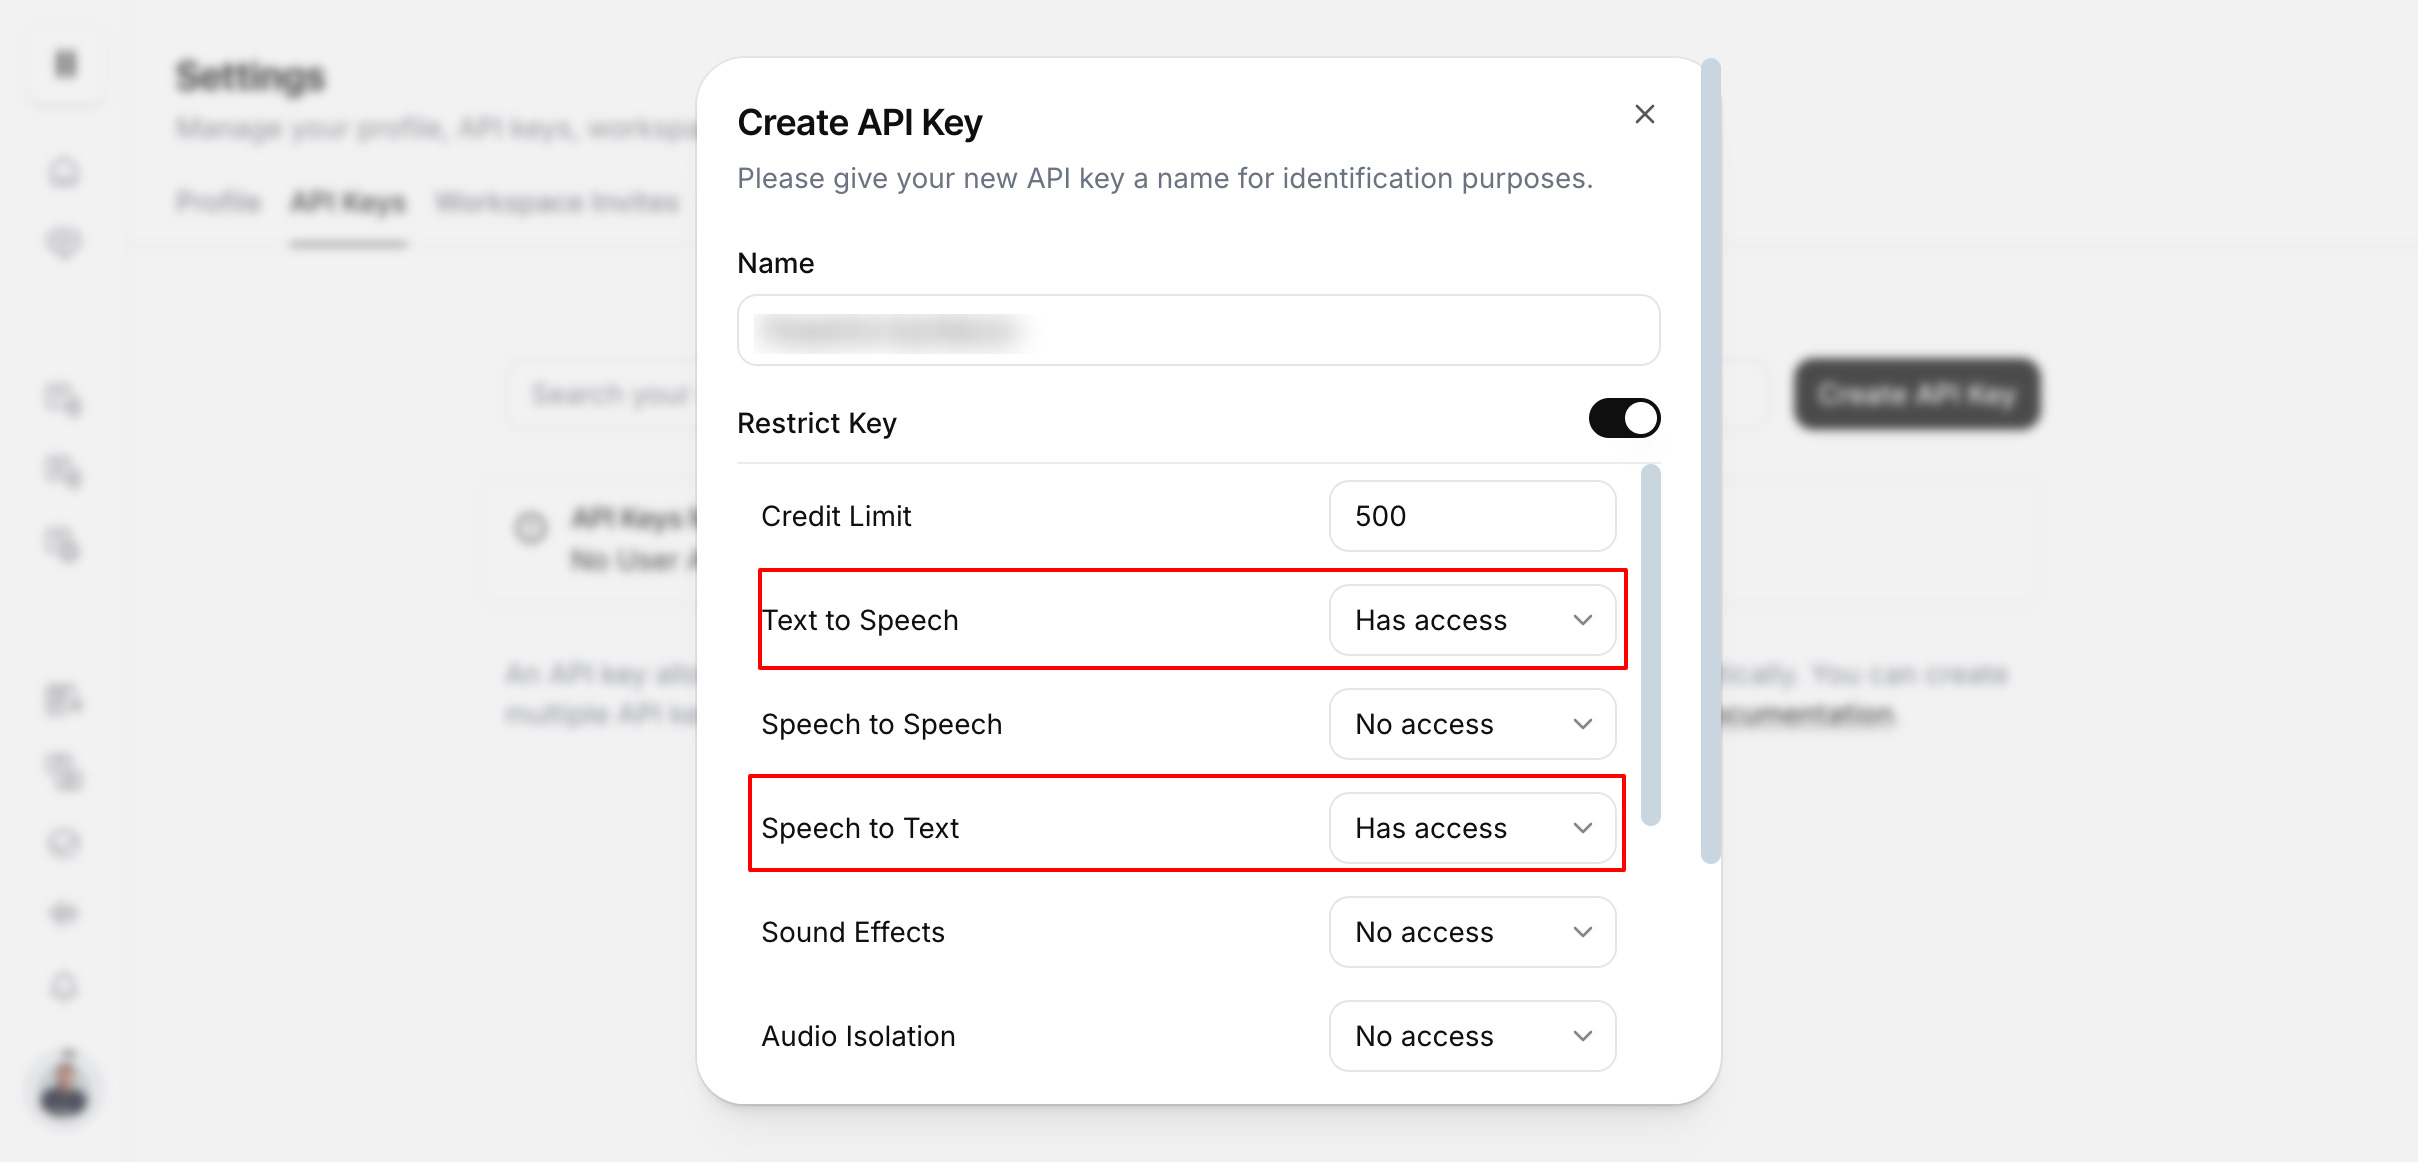
Go to ElevenLabs and create an account.
Log in, head to the “API” section (usually under your profile or settings).
Generate an API Key and save it carefully.

Pro Tip: Never share these keys publicly—treat them like your house keys!
Step 2: Install the Libraries
We’ll use Python, so let’s grab the tools we need. Open your terminal (or a code cell in Jupyter) and run:
pip install livekit-agents[openai,silero,elevenlabs]==1.0.11 fastapi==0.115.8 uvicorn==0.34.0 python-dotenv==1.0.1 httpx==0.28.1 ipython==8.13.2 -qThis installs:
livekit-agents: For building the agent.fastapianduvicorn: To run a web server.python-dotenv: To manage our API keys safely.Plus extras for OpenAI, Silero, and ElevenLabs.
The -q keeps it quiet—less clutter in your terminal.
Step 3: Set Up Environment Variables
To keep our API keys safe, we’ll store them in a file called .env. Create this file in your project folder and add:
OPENAI_API_KEY=your_openai_api_key
ELEVEN_API_KEY=your_elevenlabs_api_key
LIVEKIT_URL=your_livekit_url
LIVEKIT_API_KEY=your_livekit_api_key
LIVEKIT_API_SECRET=your_livekit_api_secret
Replace the placeholders with your actual keys and URL. Save it, and we’ll load these into our code later.
Step 4: Write the Code
Now, let’s build the agent in a Jupyter notebook. Here’s how it breaks down:
Import Libraries
Start by loading the tools we need:
import logging
from livekit import agents
from livekit.agents import Agent, AgentSession, JobContext, WorkerOptions, jupyter
from livekit.plugins import openai, elevenlabs, silero

# Set up logging to see what’s happening
logger = logging.getLogger("va-agent")
logger.setLevel(logging.INFO)
This pulls in everything—LiveKit for the agent, OpenAI and ElevenLabs for smarts and voice, and Silero for listening.
Define the Agent
Next, we create our Assistant class. This is the heart of our voice agent:
class Assistant(Agent):
    def __init__(self) -> None:
        llm = openai.LLM(model="gpt-4o")  # Brain: OpenAI’s GPT-4o
        stt = openai.STT()                # Ears: Speech-to-Text
        tts = elevenlabs.TTS()            # Voice: Text-to-Speech
        silero_vad = silero.VAD.load()    # Listener: Voice detection

        super().__init__(
            instructions="You are a helpful assistant communicating via voice",
            stt=stt,
            llm=llm,
            tts=tts,
            vad=silero_vad,
)llm: Uses GPT-4o to think and reply.stt: Turns your voice into text.tts: Makes the AI’s replies sound human.vad: Spots when you’re talking.instructions: Tells the agent to be a friendly voice helper.
Connect It All
Now, we set up a function to connect the agent to LiveKit:
async def entrypoint(ctx: JobContext):
    await ctx.connect()  # Link to LiveKit
    session = AgentSession()  # Start a session
    await session.start(
        room=ctx.room,
        agent=Assistant()
    )
This hooks our agent into a LiveKit “room”—think of it as a virtual space where the conversation happens.
Run the App
Finally, launch it:
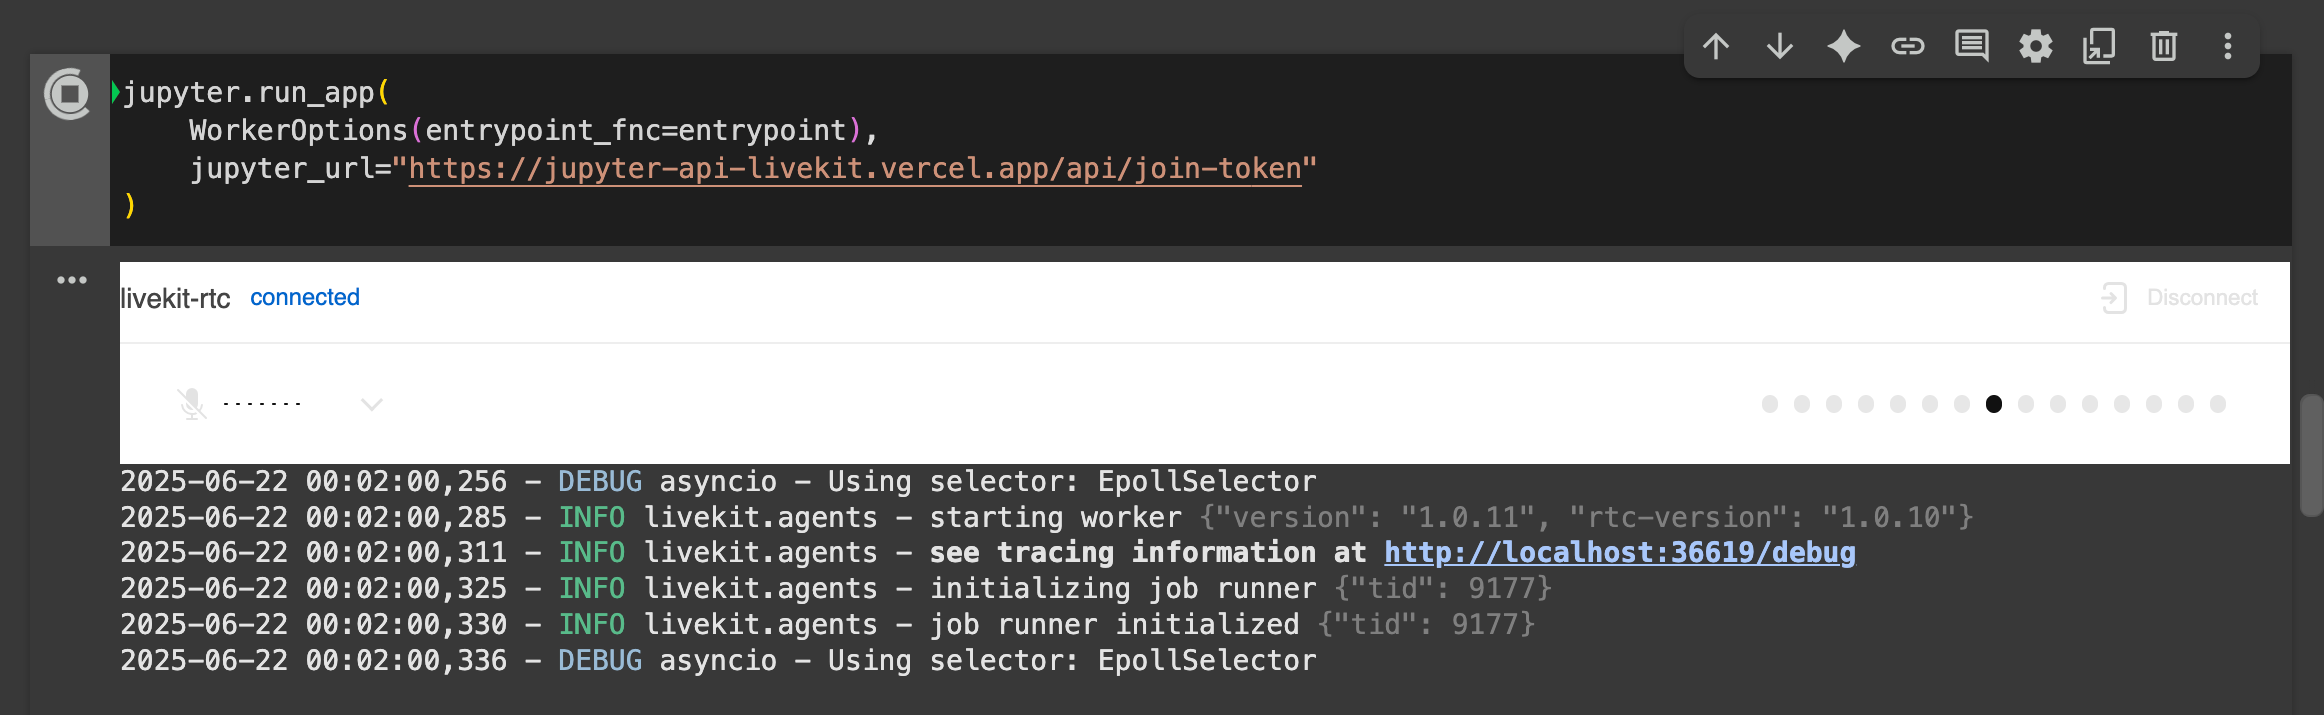
jupyter.run_app(
    WorkerOptions(entrypoint_fnc=entrypoint),
    jupyter_url="https://jupyter-api-livekit.vercel.app/api/join-token"
)
This starts the agent in the notebook, ready to chat in real-time. You’ll need to run this in a Jupyter/ Colab notebook—grab the full code from this GitHub repository to try it out!
Wrap-Up
You’ve just built a real-time AI voice agent that listens, thinks, and talks back—all with the speed and charm of a live conversation. This could be the start of a game-changing call center tool or a fun AI buddy for your next project.
A quick shoutout: This tutorial was adapted (with a few tweaks) from the awesome DeepLearning.AI short course on Building AI Voice Agents for Production. If you’re hungry for more—like how to measure and optimize latency—check out the full course.
What’s next? Keep following the “Building GenAI Apps” series for more ways to harness Generative AI. Until then, happy coding—and talking!
Samuel this is great! It’s a bit beyond me at the moment but it’s so well outlined. I’m pretty sure I could follow along and build this.
Really enjoyed this one—thanks for breaking it down so clearly. Totally agree on the importance of high-quality STT. Without accurate speech recognition, even the best GenAI apps can fall flat. It's the foundation of a smooth voice experience.